Monday 24 December 2012

Christmas Nails - December 24th


I love purple so I can't help but use purple at Christmas!

  1. Apply base coat
  2. My purple of choice here is Zoya Carly.  It's sparkly and so pretty!
  3. For the glitter I used China Glaze Luxe and Lush

Sunday 23 December 2012

Christmas Nails - December 23rd


Red, silver and green, traditional Christmas colors

  1. Apply base coat
  2. For the silver I used China Glaze The Ten Men
  3. For the design I used Konad Image Plate 89 with Special Green polish and Red Wine
  4. Apply top coat

Saturday 22 December 2012

Christmas Nails - December 22nd


A friend gave my the most gorgeous silvery purple for Christmas and I could wait to get home and use it for today's design!
  1. Apply base coat
  2. For the silvery purple I used Butter London Lillibet's Jubilee and the dark purple Zoya Carly
  3. For the pretty little snow flakes Konad Image Plate 59 and alternated the two colors for each nail
  4. Apply top coat.

Friday 21 December 2012

Christmas Nails - December 21st


Red and gold is such a traditional combination to use at Christmas.

  1. Apply base coat
  2. Apply thin layers of a gold color.  My selection here is China Glaze Cowardly Lyin'
  3. My glitter of choice here is China Glaze Electrify
  4. Apply top coat

Thursday 20 December 2012

Christmas Nails - December 20th


This one was inspired by the good ole traditional Christmas tree!

  1. Apply base coat
  2. My favourite Christmas green is China Glaze Watermelon Rind, a very pretty green with tiny flecks of shimmering glitter.  Apply in thin layers until you get to the depth of color you like.
  3. The glitter I decided on is OPI Rainbow Connection, makes me think of twinkling Christmas lights!
  4. Apply top coat

Wednesday 19 December 2012

Christmas Nails - December 19th


Hard to get this one to show up well but it is a gorgeous combination
  1. Buff and shine nails
  2. Apply Layla Hologram Effect 05 Jade Groove it thin layers until desired color is acheived
  3. Glitter used here was Essie Set in Stones
  4. Added three little stars to make it a little more special

Tuesday 18 December 2012

Christmas Nails - December 18th


Only 7 sleeps until Christmas Day!  Essie Shine of the Times is pretty and changes depending on what you put under it.

  1. Apply base coat
  2. For the base color I selected China Glaze Velvet Bow, it is a deep rich red, perfect for Christmas
  3. Apply Essie Shine of the Time
  4. To make it a little more special I added Essie Set in Stones on the tips

Monday 17 December 2012

Christmas Nails - December 17th


What is more Christmassy than gold and silver.

  1. Apply base coat
  2. For the gold I decided on China Glaze Light house, apply thin layers until the desired depth of color is acheived
  3. For the silver flecks I used Essie Set in Stones
  4. Apply top coat

Sunday 16 December 2012

Christmas Nail - December 16th


Red and Silver looks so pretty against black!

  1. Apply base coat
  2. The black selected for this one is China Glaze Smoke and Ashes.  It's a pretty black with tiny flecks of blueish green and silver glitter
  3. For the glitter layer I selected China Glaze Love Marilyn, tiny red glitter with larger silver flecks
  4. Apply top coat

Friday 14 December 2012

Christmas Nails - December 15th


Layla Hologram Effect Nail Polishes are gorgeous, I especially love how you can layer different colors and they blend into each other.

  1. Buff and Shine nails
  2. Start with the main color and cover the complete nail.  My choice for the main color is 08 Flash Black, apply thin layers until the desired depth of color is acheived
  3. For the tips I've used 01 Mercury Twilight
  4. To add a little Christmas I selected Konad special polish Silver and Image Plate 12 for a subtle snowman
  5. Apply top coat

Christmas Nail - December 14th


Very simple but classic design for today!

  1. Apply base coat.
  2. China Glaze Electrify is a gorgeous gold and red glitter just perfect for Christmas.  Apply layers until the desired effect is achieved.
  3. Apply top coat, I decided to use Essie top coat, Shine of the Times.

Thursday 13 December 2012

Comments should now be working!


Hi Everyone,

After a couple of attempts and some trial and error the comments section should now be up and running on nailzy!  Just click on the post you would like to comment on and hopefully the comments box will appear at the end of the post.

Happy commenting everyone and I hope you have a safe and enjoyable time over the holidays with plenty of time for painting your nails!


Christmas Nails - December 13th


Although not traditional, I adore purple and silver at Christmas time.
  1. Apply base coat.
  2. Use a purple, one of my favorite purples is China Glaze Grape Juice.  It's a lovely shade and has a subtle tiny glitter in it.
  3. Using Konad Image Plate 85 apply design using Konad Special Black Polish then again using Special Silver Polish.
  4. Finish off with a top coat.

Wednesday 12 December 2012

Christmas Nail - December 12th


Love this combination, and what's more Christmassy than a silver/white and red combination.

  1. Apply a base coat
  2. Use a silver or white base, I decided to use China Glaze The Ten Man. It's a lovely pearl white with a tiny silver glitter running through it.
  3. I used Konad Red Wine Special Polish with Image Plates 60 and 69.
  4. To give this a little more sparkle I used Essie Shine of the Times top coat.

Tuesday 11 December 2012

Christmas Nails - December 11th


I really like how lovely the gold looks against this green.

  1. Apply base coat.
  2. Pick a green, I selected China Glaze Watermelon Rind.  It's a perfect Christmas green and has a very tiny glitter which gives it a wonderful shimmer.
  3. For the design I used Konad Image Plate 63 with Konad Gold Special Polish.
  4. Apply top coat.

Monday 10 December 2012

Christmas Nails - December 10th


This is a beautiful, yet simple design.  Love the red bow against the light pink glitter.
  1. Apply a couple layers of glitter polish, my pick here is 2 layers of Essie A Cut Above
  2. Using a Red Flexbrush for the two lines
  3. Apply a small dot of top coat to adhere the rhinestones.  I selected four red teardrop shapes to make a bow stand out.

Sunday 9 December 2012

Christmas Nails - December 9th

Another red design...
  1. Apply base coat
  2. The red I used for this design is China Glaze Ruby Pumps
  3. For the glitter I used Essie A Cut Above, a lovely light pink glitter
  4. Apply top coat
  5. Before the top coat dries apply decals.  I used 3 pretty stars with a pearl effect to add something special to the design

Saturday 8 December 2012

Christmas Nails - December 8th

Pretty in simple gold
  1. Buff and polish nails.
  2. Using Layla Hologram Effect Mercury Twilight nail polish apply thin layers until desired depth is attained.
  3. Using gold nail tape apply design.
  4. Apply top coat.
  5. Add rhinestone of choice.
  6. Apply gold tape.

Christmas Nails - December 7th


Another design a little less traditional Christmas in grey, red and gold.
  1. Apply base coat.
  2. For the grey my choice is China Glaze Stone Cold
  3. Using Konad Special Polishes Red and Gold apply design from Konad Image Plate 85
  4. Apply top coat
  5. For something a little more special add fine red and gold balls

Christmas Nails - December 6th


For those that want something a little different than the traditional red, green and gold here is grey, silver, black with a touch of pink.
  1. Apply base coat.
  2. For the silver nails I used Layla Magneffect Silver Galaxy.  Paint and use the magnet one nail at a time.
  3. For the Pink nail I used Layla Magneffect Ruby Red (which is more pink than red)
  4. Apply a top coat.
  5. To pretty it up a little on the pink nail I used fine silver balls and added to nail running the same way as the diagonal pattern.

Christmas Nails - December 5th


Another classic Christmas color scheme, this time it's red and silver!
  1. Apply base coat.
  2. Pick a gorgeous red, my pick here is China Glaze Thunderbird.
  3. For the bells use Konad Image Plate 12 with Silver Konad Special Polish.
  4. For the glitter I used a combination of Essie Pure Pearlfection and for the larger glitter Essie Set in Stones.
  5. Apply clear top coat.

Christmas Nails - December 4th


Silver and black is always such a classic and beautiful combination.
  1. Buff and Shine nails
  2. Apply thin coats of silver.  My choice is Layla Metal Chrome Mirror Effect Nail Polish
  3. Using black Konad Special Polish with Image Plates 84 and 12.
  4. Apply top coat
  5. Couldn't resist adding a bright red rhinestone for the reindeer nose

Christmas Nails - December 3rd


Pink and gold is always such a pretty combination and Layla Hologram Effect nail polish is such a pretty pink.
  1. Buff and shine nails
  2. Apply Retro Pink Layla Hologram Effect nail polish.  Use thin layers until you reach the desired depth of color.  Here I used three thin layer.
  3. For the gold stripes I used Metallic Tape for nail.
  4. Using Konad Red and Green Special Polishes with Image Plate 12 for the candy cane and holly designs.
  5. Apply top coat.

Christmas Nails - December 2nd


This has to be one of my favorite blues and a white Konad design always looks so stunning on top of it.
  1. Apply base coat
  2. Apply Nicole by OPI Listen to your Momager!
  3. Using Konad White Special Polish apply designs.  The Snowflakes are from Konad Image Plate 59 and the Christmas Tree is from Image Plate 12
  4. Apply top coat
  5. For something a little more special I added a silver heart on each nail
Although I love this blue I do find it stains my nails even with a base coat.  After removing polish cleaning nails with a whitening toothpaste can help reduce the staining

Christmas Nails - December 1st


For my first design of the Christmas season I kept it simple, color and glitter.
  1. Apply Base Coat
  2. My green of choice here is China Glaze Watermelon Rind
  3. China Glaze Love Marilyn is a gorgeous mix of Silver and Red glitter, perfect for Christmas
  4. At this stage you could just use a normal top coat but I decided to use an Essie Top Coat As Gold as it Gets.  Its a Clear Top coat with a gorgeous sparkly gold running through it.

Sunday 14 October 2012

Gelicious Aphrodisiac and Konad Nail Design


Yes it has been a little long since my last post! 

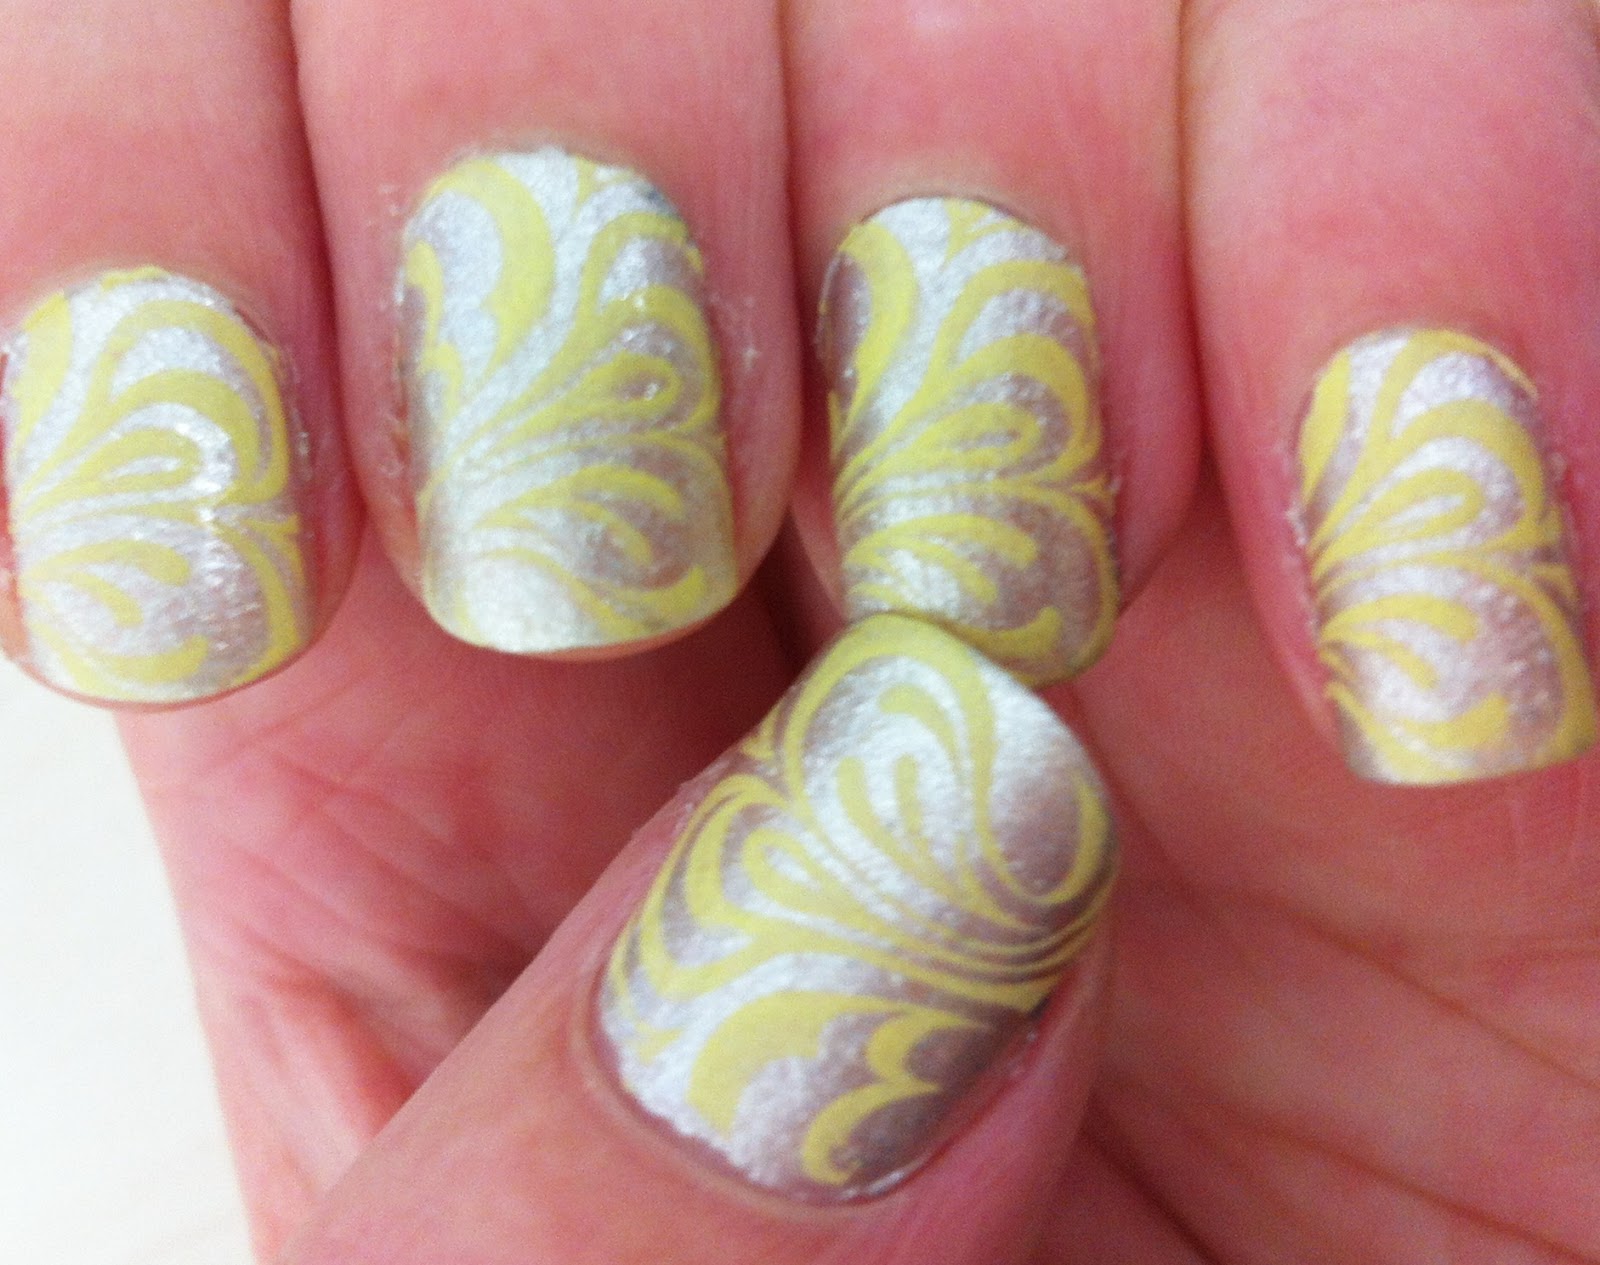
I bought myself a Gelicious Nail Polish kit and wow, I am really impressed with the results and combines beautifully with Konad Nail Designs.  Yes it does take a little more time but the picture above is seven days after the initial application and still looks absolutely gorgeous!

The kit came with UV lamp, a top coat and a color.  Bought an additional couple of colors and a base coat.

When applying do not go right to the edge of the nail at the base.  I found the polish will spread out a little and by going right to the edge I found pooled a little ending up with a very think edge.


  1. Clean and buff nails.
  2. Do one hand at a time for the next steps
  3. Apply Gelicious Base Coat.  This is an optional step but one I prefer to use.
  4. Cure under UV lamp for 1 minute.
  5. Apply a thin coat of color.  My pick for this design is Aphrodisiac, a sparkly pink.
  6. Cure under UV lamp for 1 minute.
  7. Apply a second thin coat.
  8. Cure under UV lamp for 1 minute.
  9. Apply Top Coat.
  10. Cure under UV lamp for 2 minutes.
  11. Using a cotton ball and Acetone Nail Polish Remover, wipe over each nail.  This will clean off any sticky residue and leave a gorgeous shine.  At this stage the nails are stunning and can be left as is but I couldn't help but see how konad would work with the Gelicious polish.
  12. Using Konad Image Plate 51 with Konad Special Black Polish apply design.
  13. For the final Top Coat I used my standard OPI Nail Envy Nail Strenthener.
  14. Wait to dry and enjoy!

Tuesday 28 August 2012

Funky Glitter with Crazy Konad Design


I was in need of a funky, crazy design and loved how this turned out.
  1. Apply base coat
  2. With so many glitters to choose from for this design I went with OPI's Save Me
  3. Using Konad black special polish with Image Plate 65
  4. Apply top coat

Saturday 25 August 2012

Sweetly Grey with Magenta Konad Design


Grey and Pink have always been a favorite combination and I was very pleased how this design turned out.
  1. Apply base coat
  2. I used one of my favorite greys, China Glaze Stone Cold.  Its a gorgeous graphite matte grey
  3. When dry apply Konad design using Image Plate 60 and Magenta special polish
  4. Apply top coat

Friday 24 August 2012

Bubbly n Pink Konad Design


How sweet is this, beautiful soft base with purple and pink "bubbles"!

  1. Apply base coat
  2. For the base color I chose China Glaze Light as Air
  3. When dry apply circles using Konad Image Plate 85 and special polish Light Gray
  4. Using the same Image plate and special Magenta polish apply a second set of rings
  5. Apply top coat

Saturday 4 August 2012

Deep Purple - Konad Nail Design


This uses two Konad designs and a sparkly top coat
  1. Apply base coat
  2. My pick for a base color is China Glaze Stella
  3. When the base color is dry I used Konad Image Plate 65 with Special Gold Polish
  4. When the first Konad design is dry add a second one using Image Plate 36 and Special Polish Magenta
  5. For a top coat I used Essie Luxeffects Pure Pearlfection

Tuesday 24 July 2012

Delicate Flower - Layla Hologram Polish with Konad Design


Loved how pretty this design turned out.  Layering with Layla Hologram polishes has a beautiful effect.

  1. Buff and polish nails
  2. Apply Layla Hologram Flash Black in layers until desired depth of color is reached
  3. When first color choice is dry apply a second Layla Hologram color on the tips.  My choice here is Mercury Twilight
  4. When dry apply a design of choice, mine is from Konad Image Plate 38 combined with special polish Red Wine
  5. Apply top coat

Sunday 22 July 2012

Spring Morning - Konad Nail Design


It may be the middle of winter but there's nothing like a gorgeous spring design to brighten things up on a dreary day!

  1. Apply base coat
  2. For my base color I selected a very delicate sparkly silver, China Glaze The Ten Man
  3. For the design I used Konad Image Plate 63 with special polish Pale Yellow
  4. Apply top coat

Wednesday 11 July 2012

80s Flash Back - Konad Nail Design


Felt the need for a funky sparkly design and what better than combining a Layla Holographic Polish with a awesome Konad design.
  1. Apply Base Coat
  2. For the base color I choose Layla Hologram Effect Ultra Violet.
  3. I used one of my favorite designs from Konad Image Plate 70 combined with Psyche Pink Konad Polish.
  4. Apply Top Coat.

Saturday 7 July 2012

Sweetly Pink - Konad Nail Design


This design and color combination turned out so much prettier than I expected.
  1. Apply Base Coat.
  2. For my base color I choose OPI Lincoln Park at Midnight.  This is a gorgeous rich dark purple that is one of my favorite polishes.
  3. Using Magenta Konad Special Polish apply design from Image Plate73.
  4. Apply Top Coat.

Friday 6 July 2012

Gray Days - Konad Nail Design


A chic gray number to match my wintery mood...
  1. Apply base coat
  2. Pick a nice gray, my pick here is China Glaze Recycle
  3. When dry add Konad design from Image Plate 73 with Black Konad Special Polish.  I used a plain White Konad Special Polish for one nail.
  4. Apply Top Coat and for an extra sparkle I added a pretty light blue Rhinestone.

Tuesday 15 May 2012

Purple with Black Hearts - Konad Nail Design

This one got plenty of likes on the Do You Love Nail Polish facebook page and they know what they love!  Definitely a combination I'll be using again :)
  1. Apply base coat
  2. Pick your favourite purple (yes I know there are too many to choose from!) but for this combination I used China Glaze Stella
  3. Apply Konad design.  I used special black polish and image plate 85
  4. Apply top coat


Tuesday 1 May 2012

Layered Layla Hologram Nail Polish


The picture definitely doesn't do this one justice!  I would suggest you try it out for yourself to see just how pretty it is.  I have used 4 different Layla Hologram nail polishes layered for a gradient effect.
  1. Buff/Shine nails.
  2. Apply Mercury Twilight to all of nail.
  3. Leave a small gap and start with second colour, my second pick is Mermaid Spell.
  4. Again leave a gap and apply third choice, mine was Ultra Violet.
  5. For the tip I used Flash Black.

Monday 23 April 2012

Retro Pink - Layla Hologram and Konad Design


This turned out so very pretty, definitely a retro vibe!
  1. Buff/Shine nails
  2. Apply Layla Holographic Retro Pink in thin layers until desired depth of colour is achieved.  Make sure you let each layer dry before the next application.
  3. Using Konad Light Gray special polish apply design from Image Plate 51.
  4. Apply top coat.

Thursday 19 April 2012

Black Rainbow - Layla Hologram and Konad Design


Another gorgeous Layla Hologram and Konad design
  1. Buff/Shine nails
  2. Apply thin layers of Layla Hologram Flash Black, let layers dry in between applications until you reach the depth of colour you desire.
  3. When dry apply design using Konad Image Plate 69 with special black nail polish
  4. Apply top coat.

Wednesday 18 April 2012

Holographic Ultra Violet - Layla Hologram and Konad Design


I am loving the Layla Holographic nail polishes.  The purple does not quite show up as deep as it should in the picture.
  1. Buff/Shine nails
  2. Apply Layla Holographic nails.  For this design I used Ultra Violet.
  3. Use Konad Image Plate 70 and special black polish.
  4. Apply top coat.

Pretty Stars - Layla Hologram and Konad Design


Holographic nail polish rocks!
  1. Buff and Shine nails
  2. Apply thin layers of Layla Holographic nail polish, my choice here is Jade Grove.  It has a beautiful hint of green in it.  Let the layers dry in between each application to you reach the desired density.
  3. When dry, using Konad image plate 84 and black special polish, apply design.
  4. Apply top coat.

Wednesday 11 April 2012

Autumn Inspired Design


As I've done a Winter and Spring design thought it was time for an Autumn inspired design and there are some very pretty colours to choose from.  Loved the end result!
  1. Apply base coat
  2. Select your favoured Autumn colours, my choices are both from China Glaze.  The lighter orange is Crusin' and the deeper orange is Street Racing.  Apply on alternative nails and leave to dry.
  3. Once dry apply a shatter/crackle polish.  My choice here is China Glaze Black Mesh.
  4. Apply top coat.

Thursday 5 April 2012

Yes Another Pink Bunny for Easter


Couldn't resist doing another pink bunny design for Easter
  1. Apply base coat.
  2. Pink a pretty purple and yes there are so many gorgeous purples to choose from!  My choice is China Glaze Grape Juice.  This picture doesn't do it justice but it has a beautiful sparkle to it.
  3. Apply a shatter/crackle polish.  I used China Glaze Haute Metal
  4. Apply top coat
  5. Add rhinestones to form a bunny

Tuesday 3 April 2012

Pink Bunnies


Time for another Easter design.
  1. Apply base coat
  2. Use a nice black nail polish.  My choice here is OPI Black Onyx and wait to dry.
  3. Make sure the black coat is dry then add a gorgeous glitter.  I've used China Glaze Prismatic Chroma Optical Illusion.  The picture doesn't do justice to this very gorgeous holographic glitter.
  4. On one nail on each hand just use the glitter on the tip.
  5. Apply top
  6. Add decoration or design of choice on the black part of the nail.

Saturday 31 March 2012

Easter is almost here - Konad Design


This is an Easter inspired design!  Its a very lovely take on the prettiness of Easter with the traditional gold, silver, pink and purple!
  1. Apply base coat
  2. Alternate gold and silver on each finger.  My choice of base colours here are China Glaze Cowardly Lyin' and The Ten Man.  I used three very thin coats to get desired result.  Make sure you let each coat dry to avoid bubbling.
  3. Using Konad Image Plate 78 and special polishes gold and silver alternate gold on silver and silver on gold.  This will give a very subtle foil look.
  4. Then using Image Plate 64 add design twice using special polishes Magenta (a pretty sparkly pink) and Light Gray (more purple than gray!).  I started doing the pinks first then overlayed the gray.
  5. Finish with a top coat 
  6. If desired add a couple of rhinestones

Wednesday 28 March 2012

Konad Image Plate Storage Option


The Konad Image Book is awesome and a great way to store your plates and get great design ideas.
  1. Using fine sandpaper or a file rough up the back of the plate
  2. Attach a mini velcro dot in the centre where the hole in the image plate holder would be.
  3. Put the other half of the dot in the book
  4. Attach Image Plate and enjoy!

Hot Chocolate - Konad Design


This is a very frustrating design as the polish doesn't stay on the design on the plate well.  With that in mind it is worth the effort!
  1. Apply base coat.
  2. Select a beautiful brown, here I've used China Glaze Goin' My Way
  3. Use Konad Image Plate 73 and gold special polish, you will need patience with this design.
  4. Finish with a top coat

Saturday 17 March 2012

St Patrick's Day 2012 - Konad Design


I could hardly let St Patrick's Day pass with out a green & white number now could I?
  1. Apply base coat
  2. Use a gorgeous green of choice, mine is OPI Jade is the New Black
  3. To brighten up the green a little I added a layer of Essie Pure Pearlfection
  4. When Pearlfection is dry using Konad White apply design from image plate 64.
  5. Add top coat

Thursday 15 March 2012

Subtle Gold - Konad Design


This combination surprised me as I didn't think the gold Konad design would show up but it ended up gorgeous!
  1. Apply base coat
  2. Use a soft light brown, here I used China Glaze Fast Track from the Capitol Color - The Hunger Games range.  Its a beautiful soft brown with the tiniest gold flecks running through it.
  3. For the design I used Konad Image Plate 64 and special gold polish
  4. Finish with a clear top coat